I'm still working on adding projects to this, so the lower projects are not yet clickable.
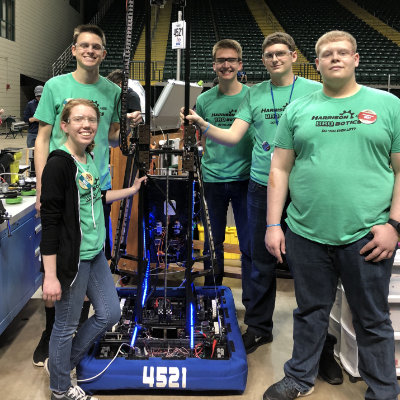
2018 FRC Robot
As a primary leader, I headed major management and design aspects of our award-winning, 125lb robot, Pegasus.

Space Race Project
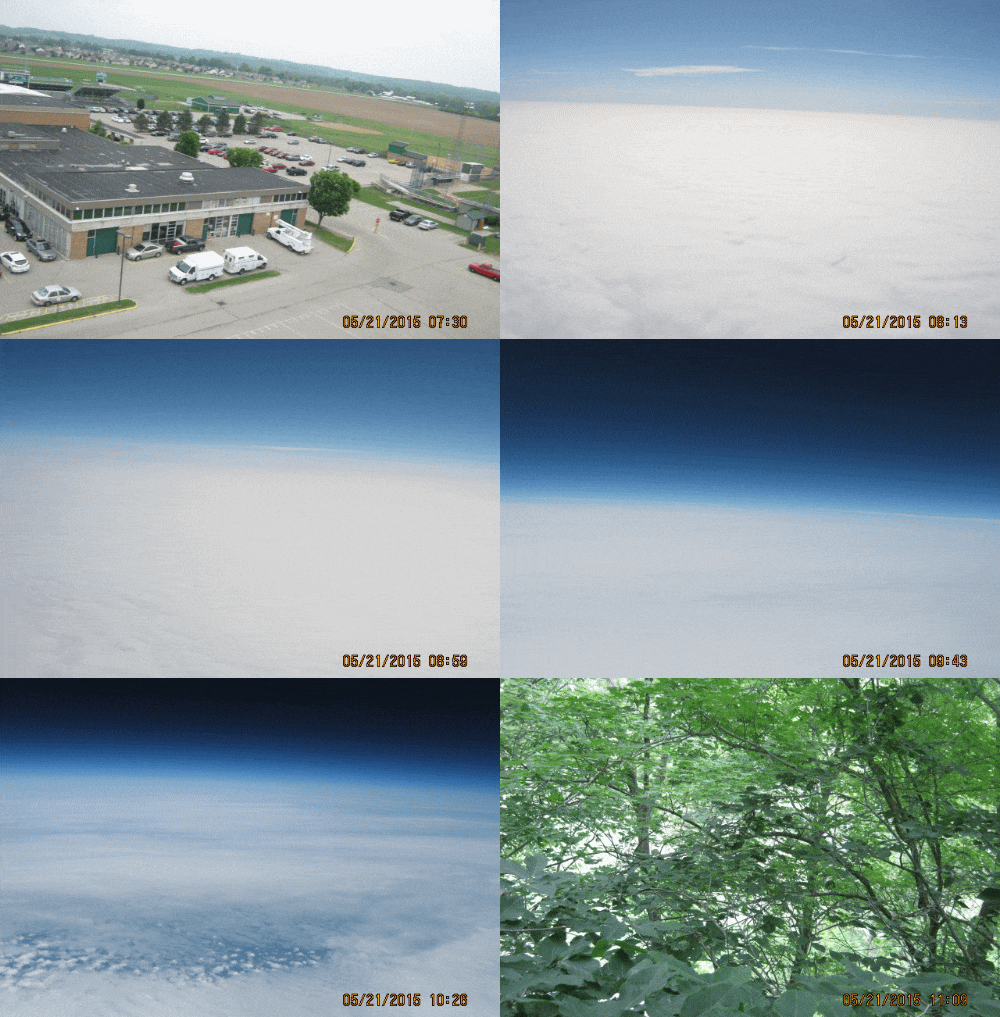
I led a team in 8th grade that launched a high altitude balloon to around 110,000 feet while capturing weather metrics and images.
IPS
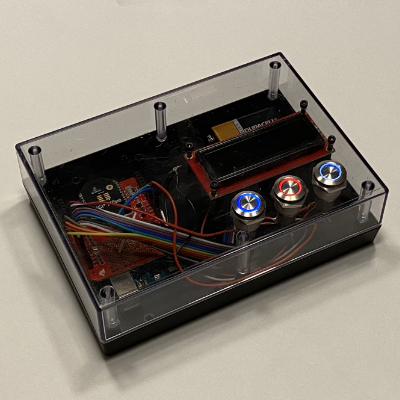
I constructed an indoor positioning system (IPS) utilizing ZigBee transceivers to allow for more accurate location tracking in areas where GPS does not suffice.
CubeCats Project Lykoi
I was the Communications Team Lead for Project Lykoi, A near-space sensing and flight mission within CubeCats.
Fall 2019 ENED
I was my team's leader for my first-year engineering class at UC. I implemented control techniques and 3D printing to improve our main project.
IPS Academic Paper
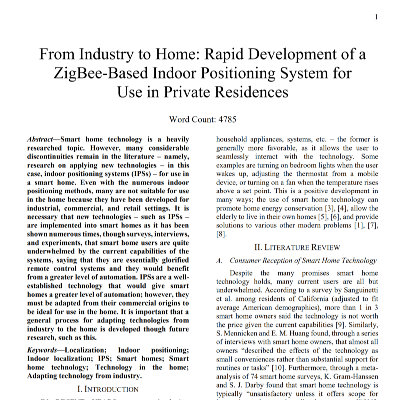
I wrote an IEEE style academic paper based on research I performed using the indoor positioning system (IPS) I constructed.
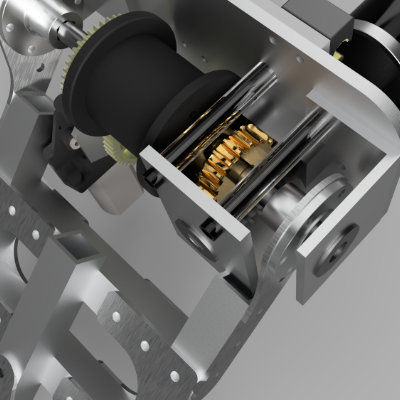
2019 FRC Robot
As CEO of the robotics team, I facilitated the team's technical and management operations.
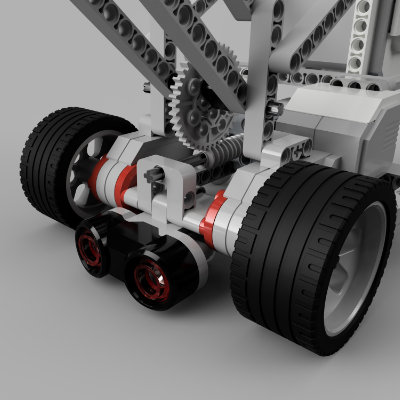
Spring 2020 ENED
In part two of UC's first-year engineering course series, I was able to use MATLAB, CAD programs, and more to complete various projects.
Personal Website
You've already seen this! This was my first major web development project. I utilized HTML, CSS, and jQuery to build this site (no drag-and-drop tools, etc.).
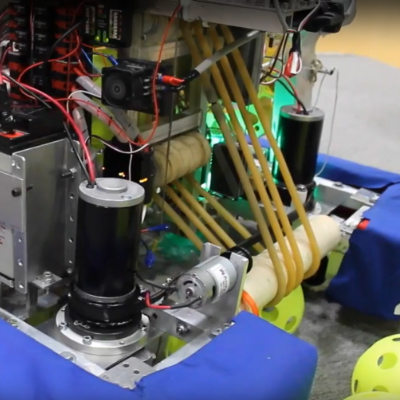
2016 & 2017 FRC Robots
Both of these years, I acted as the only programmer and robot electrician. I had to learn the skills on my own.
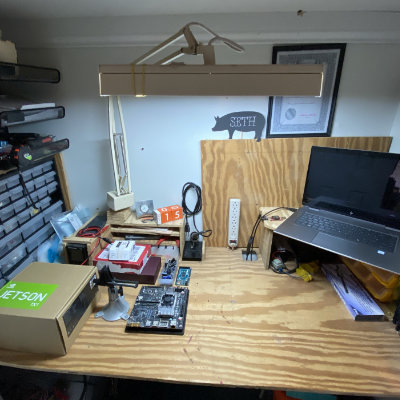
Electronics Workbench
I built a workbench in my closet out of scrap-wood in 2016. Since then I have worked on numerous projects on it – some of them in this portfolio.
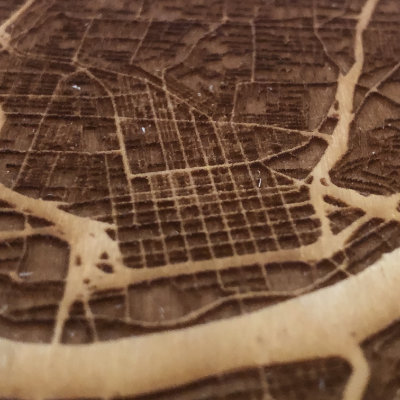
Wooden City Maps
I designed these maps using OpenStreetMap and vector editing software and then laser engraved them to make Christmas gifts.
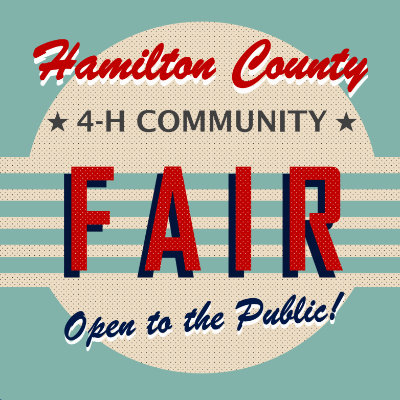
Hamilton County 4-H Fair Ads
While on the Hamilton County 4-H Fair Board, I designed many advertisements for the fair, primarily with Affinity software.
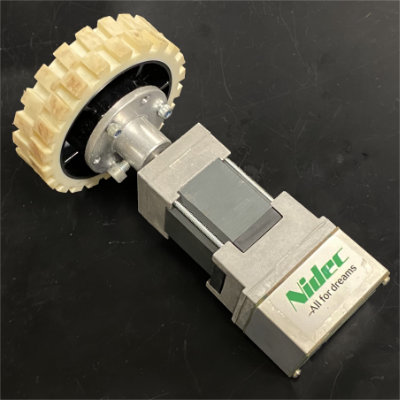
2017 LabVIEW Beta Testing
I was selected in 2017 to beta test a set of robotics libraries for LabVIEW, along with a new brushless motor for use in robotics.
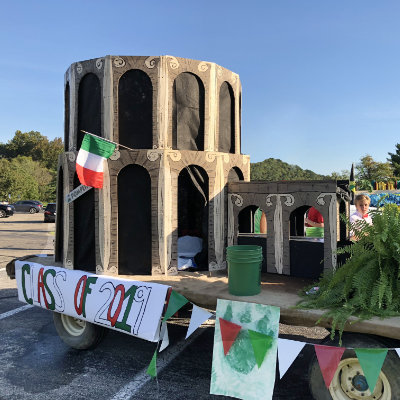
Homecoming Floats
Throughout high school and college, I have led the design/construction of numerous homecoming floats. It's always a fun way to put some engineering skills to work.
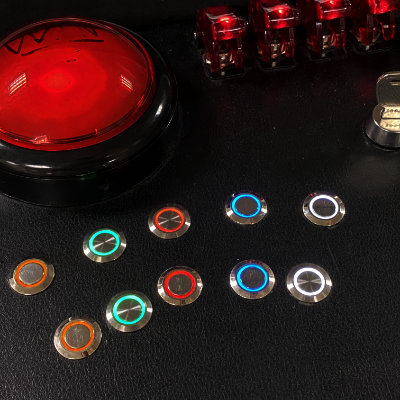
FRC Controls
I built a new control case for my FRC team to use with the robot. It includes input devices, as well as means for driver feedback from the robot.
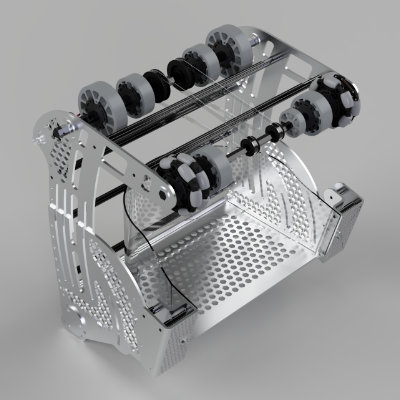
CAD Repo
This is a CAD repository I am working on putting together with some of my favorite work. Most was made in Fusion 360. It includes assemblies parts, and renderings.

More to come...
Fall 2019 ENED
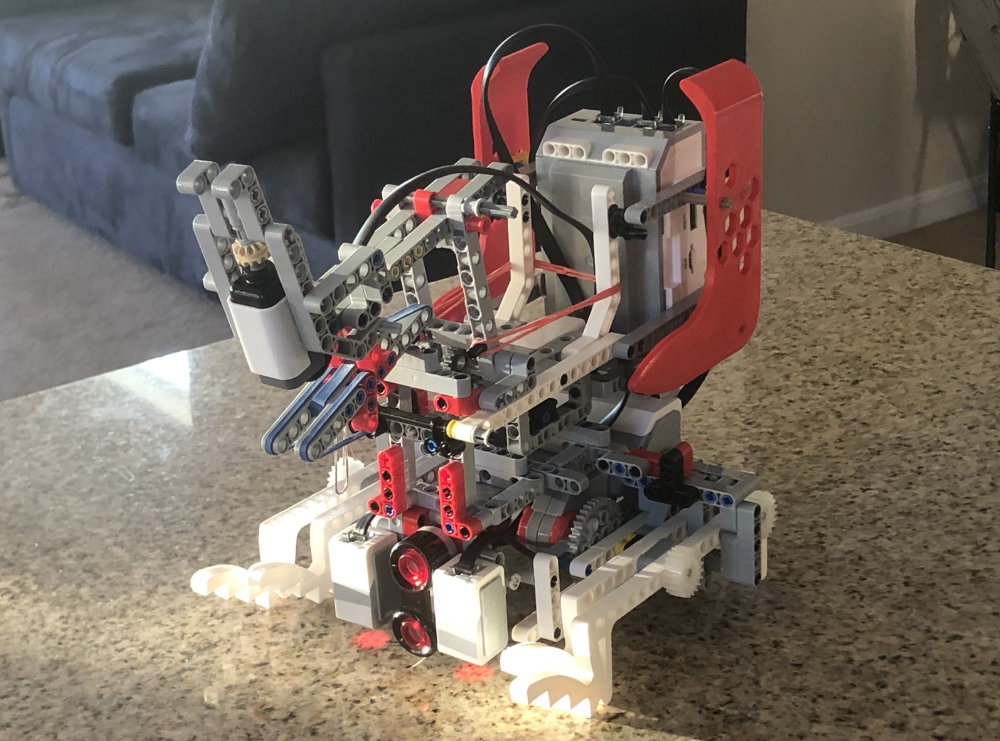
Robot for the main project
Overview
UC's first-year engineering course consists of various individual and team projects. I acted as the project manager for my team for the first semester of the course series. As a team we worked on two large projects and many small projects. As for individual work, I completed various miniature projects during class. Our main project (a walking robot that sorts recycling materials) earned the highest score out of the entire first-year engineering population.
LabVIEW
LabVIEW was one of the main curriculum elements of the course. It was used throughout the course, notably in the main robot project, for which I was the main programmer. In that project, I implemented various control techniques including a proportional loop control based on a floating setpoint to keep both legs in sync. For the miniature projects throughout the course, I implemented sequential, conditional, and repetitive programming to create algorithms and problem solving programs.
Team/Project Management
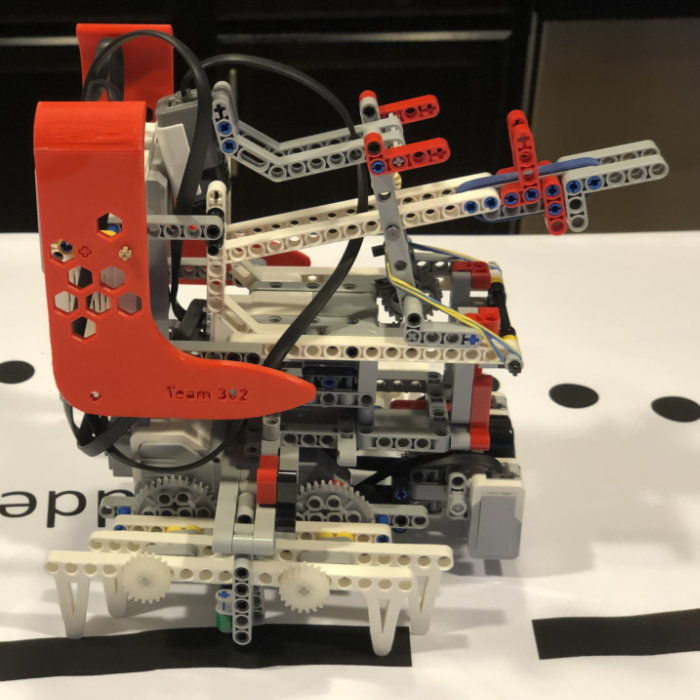
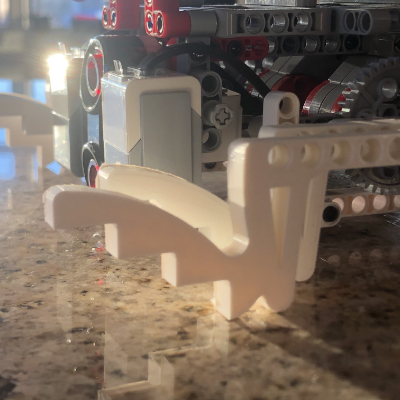
3D printed white legs and red facade are visible here
Being the Project Manager for my team, I was responsible for writeups that analyzed the team and our products, preparing a presentation on our robot design, interfacing with the teaching staff, creating project management materials (Gantt charts, role descriptions, etc.), and more. This was an especially big job for the robot project, as a lot of managerial paperwork was required.
3D Printing
3D printing was not an official part of the course; however, 3D printing was allowed for the main robot project. For my team, I produced a set of legs for our robot that allowed us to be one of the only teams that stepped over the large obstacles. Additionally, I produced facade elements for the aesthetic component of our score.
Microsoft Office
Excel was a main curriculum component of the class. I was able to expand my Excel skills and apply them to solving engineering problems.
I also used Word and PowerPoint to produce reports and presentations.
Supporting Content
A video of the robot walking
The design presentation I prepared
The management report I prepared
The notebook that we worked on throughout the project
2018 FRC Robot
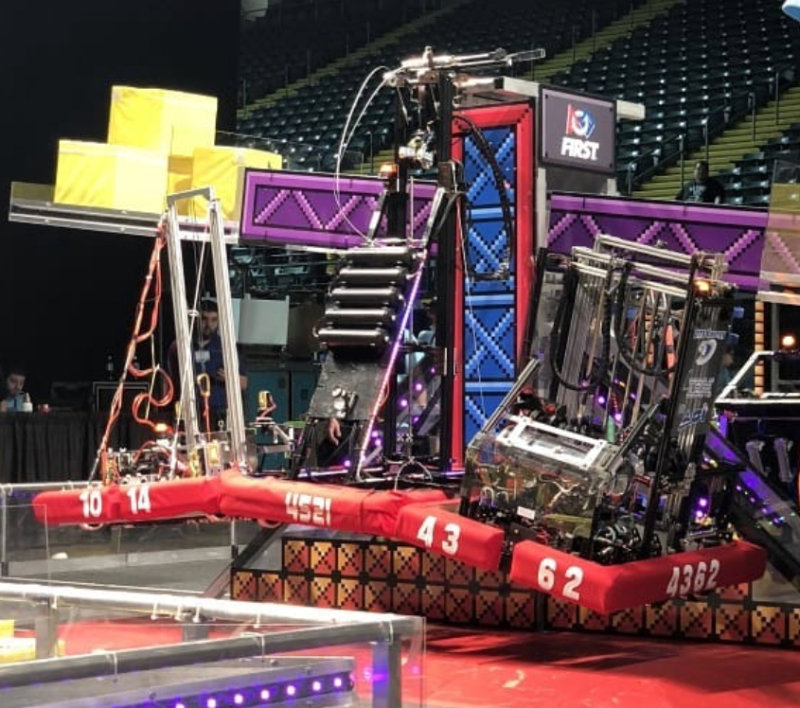
My team's robot (center) lifting two other teams for extra points
Overview
Throughout high school, I was part of FRC team 4521. 2018 was our best season ever, including 3rd place in the region and a trip to the world championships. At its most basic level, FRC consists of thousands of teams that are given 6 weeks to build a robot that competes in a sport-like game against the other robots. In 2018, I was the Head of Programming & Electrical Division, Drive Coach, and CFO. I also lead the development of some mechanical subsystems including the two-stage elevator.
LabVIEW
As Head of Electrical & Programming Division, I was responsible for developing the majority of the robots code in LabVIEW. Our 2018 robot had more sensors than ever, so I worked to make many functions of the robot autonomous; this allowed the drive team to effortlessly control the robot. I implemented control states to allow the robot to react to changing sensor input.
Team/Project Management
As the CFO, I was responsible for keeping the project on budget, ordering parts, dealing with purchase orders, meeting with potential sponsors, and more. Our season budget was over $23,000, which included registration, travel to 4 events (Dayton, Columbus, Pittsburgh, and Detroit), and materials/parts.
Aluminum Metalwork
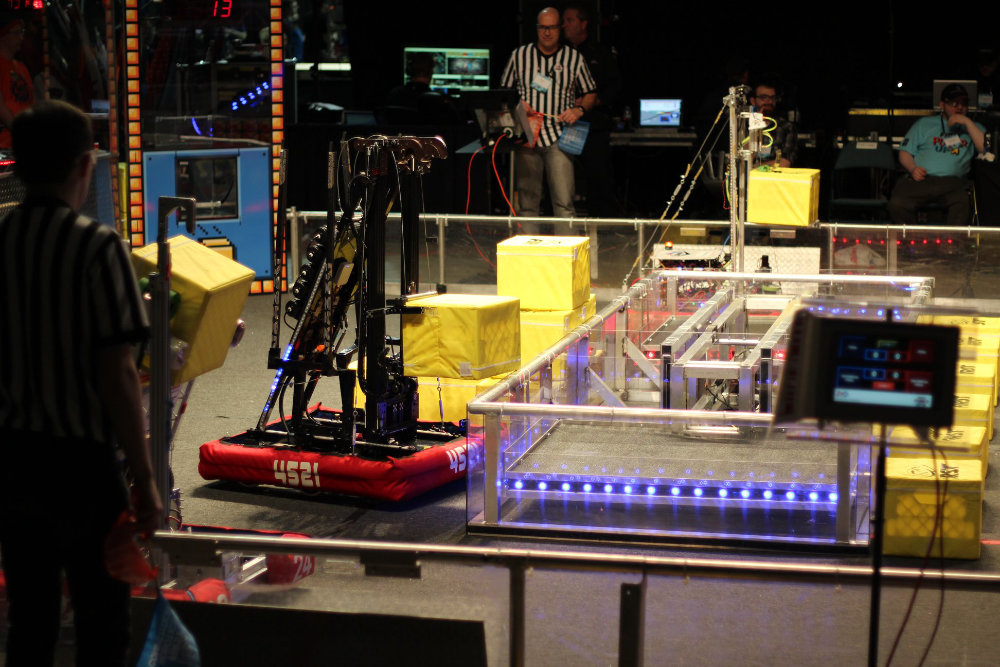
The robot placing a cube during a match
Leading some subsystems in 2018, I was able to become more familiar with new aspects of aluminum metalwork. We used a T-slotted framing system for prototyping and building the two-stage elevator. We chose this to allow us to easily achieve smooth linear actuation. I also gained experience with aluminum finishes – we powder coated our robot to increase aesthetic appeal. Additionally, I produced some basic aluminum parts through manual milling.
Fusion 360 CAD/CAM
The team used Fusion 360 throughout the season plan the robot and to design parts for manufacture. I was able to design systems around real-world components (e.g. from McMaster-Carr). I also produced G-Code for machining parts using Fusion's CAM engine.
CNC Machining
There were a few instances where our machining team was not available. During those times I operated our CNC mill and lathe to ensure we were on schedule. I mostly machined aluminum and engineered plastics such as Delrin.
Technical Writing & Microsoft Office
As CFO, I used Excel to organize our budget.
During the competition, judges come to teams to talk about their design. For the team, I produced a "Technical Handbook" in Word which recorded our design process and explained our systems. It can be found below.
3D Printing
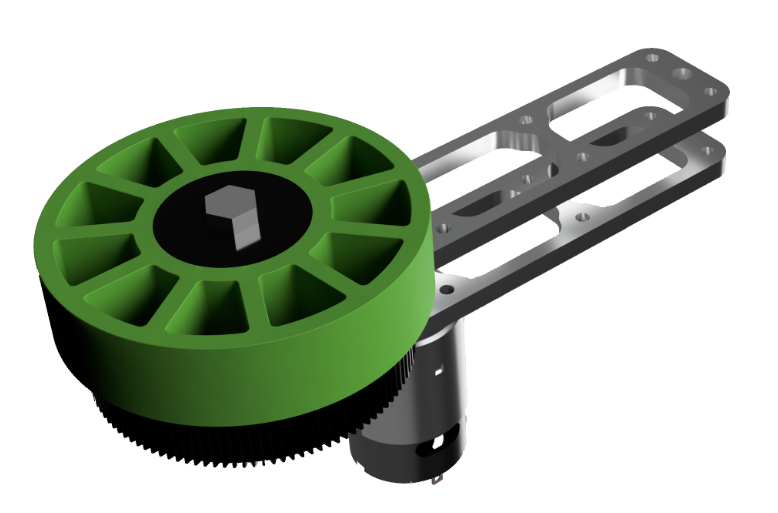
A Fusion 360 rendering I produced, including the 3D printed gear model
Partway through the competition season, we began having trouble with our acquisition system. We redesigned the acquisition; however, we did not have the proper gears for it on-hand, and we had no time to order them. A few of us on the team quickly came up with a plan to 3D print the gears. We assumed that they would break quickly since they were plastic; however, by the end of the season, they showed no signs of failure and worked great.
I also designed and printed various sensor mounts to be placed on the robot.
Supporting Content
The Technical Handbook I prepared
A video of one of our matches at the world championships (our robot is 4521)
A video of the robot during the build season with its old acquisition
Space Race Project

Timelapse of the images captured
Overview
In 8th grade, I led a team of students to build and launch a high altitude balloon. I managed the project by splitting up the team into flight systems and electronics sub-teams. I did the electronics and managed ordering parts, so I became familiarized with purchase orders. For the electronics, we included 3 cameras that we modified with CHDK to take timelapses and an Arduino I programmed and wired to various sensors, including a GPS. The balloon rose to around 110,000 feet and collected images, location data, temperature, humidity, light luminosity, and more. The Balloon was launched from west of Cincinnati and landed on a farm near the Ohio-West Virginia border.
Team/Project Management
I broke the team up into electronics (which I managed) and flight systems sub-team. The flight systems team was responsible for the payload box and the parachute. Their main challenge was the parachute, so at the beginning of the project we met and decided what criteria the parachute must meet the be successful. I checked in on their progress over the weeks until we had a working system.
My junior school funded the project, so I also managed submitting purchase orders for parts throughout the process.
Arduino
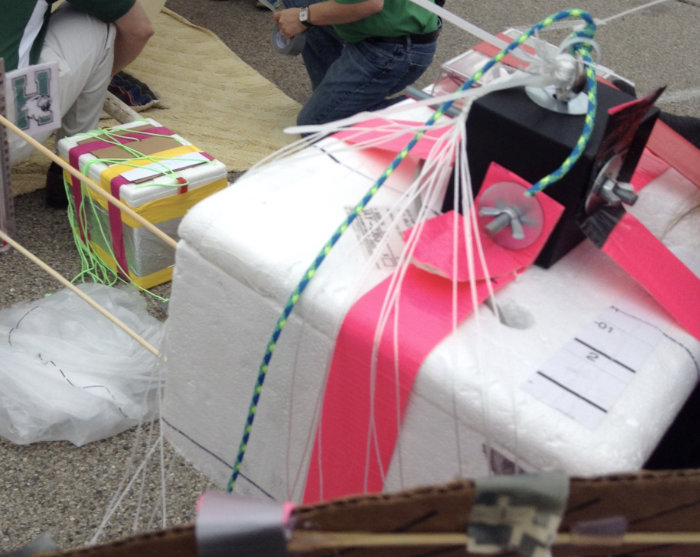
The payload
This was my first experience using Arduino. I programmed an Arduino Uno to read from various weather sensors and a GPS, then write this data to an SD card. I did all of the wiring and programming. In addition to the aforementioned sensors, I also placed limit switches on the bottom of the payload that would stop sensor collection upon landing as to not fill up the SD card.
Supporting Content
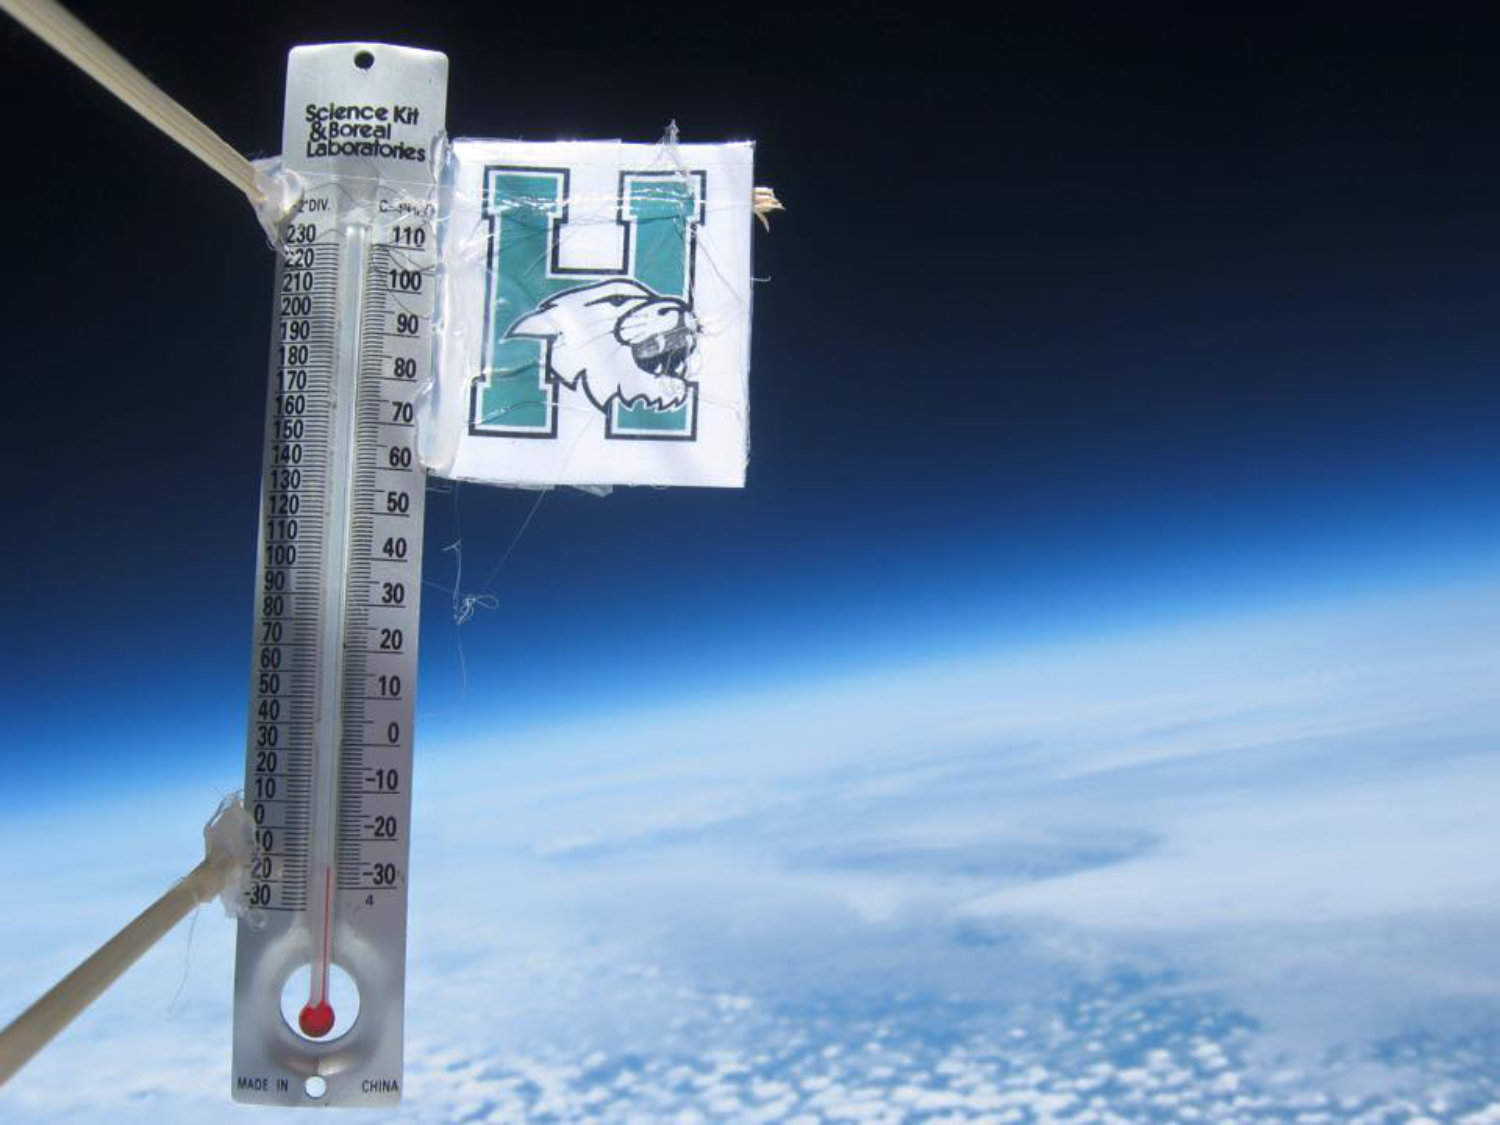
An image from one of our cameras with our "back-up thermometer"
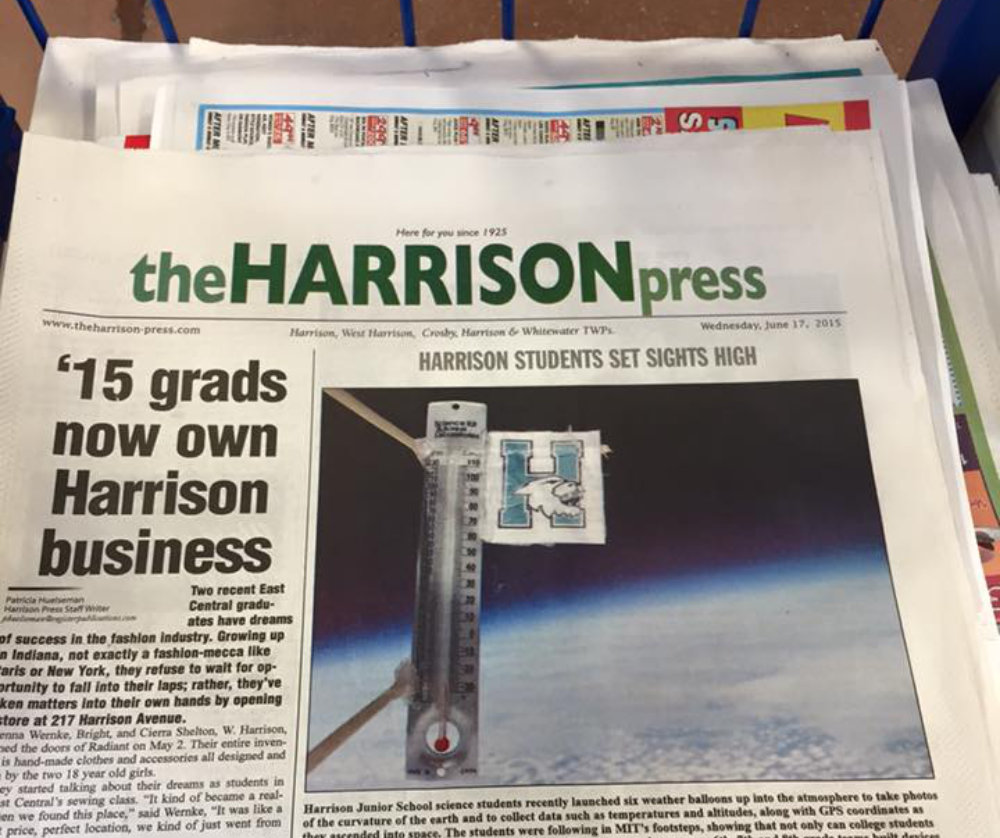
Our project was featured in the local paper
CubeCats Project Lykoi
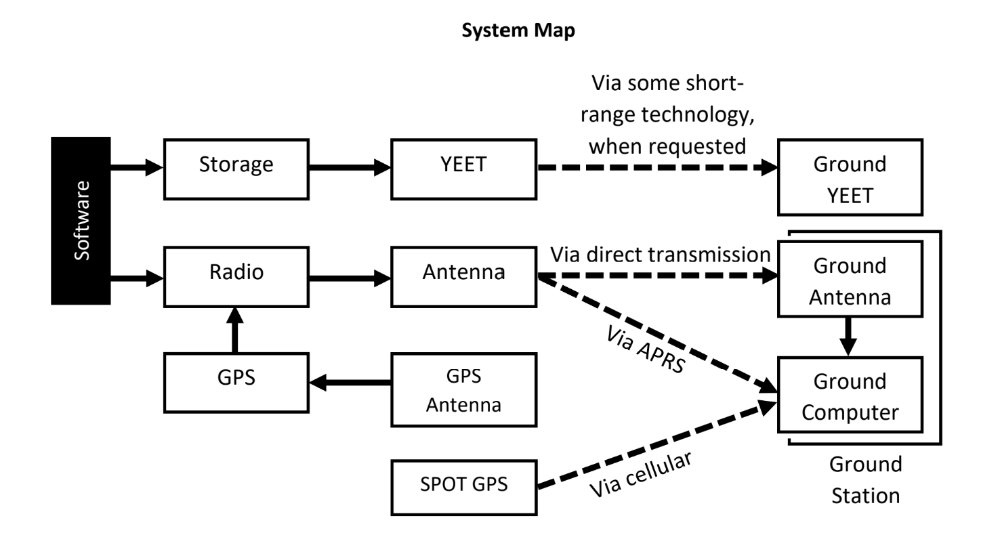
This is a data-flow diagram that I developed to organize the team's ideas
Overview
Project Lykoi was a mission that aimed to send a glider to around 19 miles above sea-level, release the glider, and then guide it as it fell towards the earth. It was part of CATiSE—a program within CubeCats intended to train first-year students before they move onto the cubesat portion of the club. I was the Team Lead for the Communications team. My role in the team involved project management, COTS SDR development, antenna design, and more. The launch was originally planned for the end of the Spring 2020 semester; however, campus lockdown restrictions delayed the project, and it was later passed on to the next year's CATiSE class.
Team/Project Management
As Team Lead, I managed around a dozen other students. My team was charged with all communication-related aspects of the mission. I led the team as we produced design deliverables, fabricated parts, and defined system architecture. I employed use of design techniques such as trade studies, strawman architecture plans, etc. I also spent a significant amount of time interfacing with the other sub-teams to ensure that our systems could be properly integrated.
Wireless Communication
As can be imagined, this was a very important skill for the Communications Team. We dealt extensively with software defined radios (SDRs), the APRS protocol, antennas, and more. Our final architecture used APRS (a packet reporting protocol used on an amateur radio band) for the primary ground-payload communication. We also designed a system that would have allowed us to extract the data from the payload in the scenario that we were able to get close to it on the ground but could not physically access it (e.g. if it lands in a tree).
Arduino
We were using an Arduino as our on-board microcontroller. We were programming the Arduino to collect sensor and GPS data, format it, and pass it off to the radio.
Supporting Content
Project Site
Indoor Positioning System
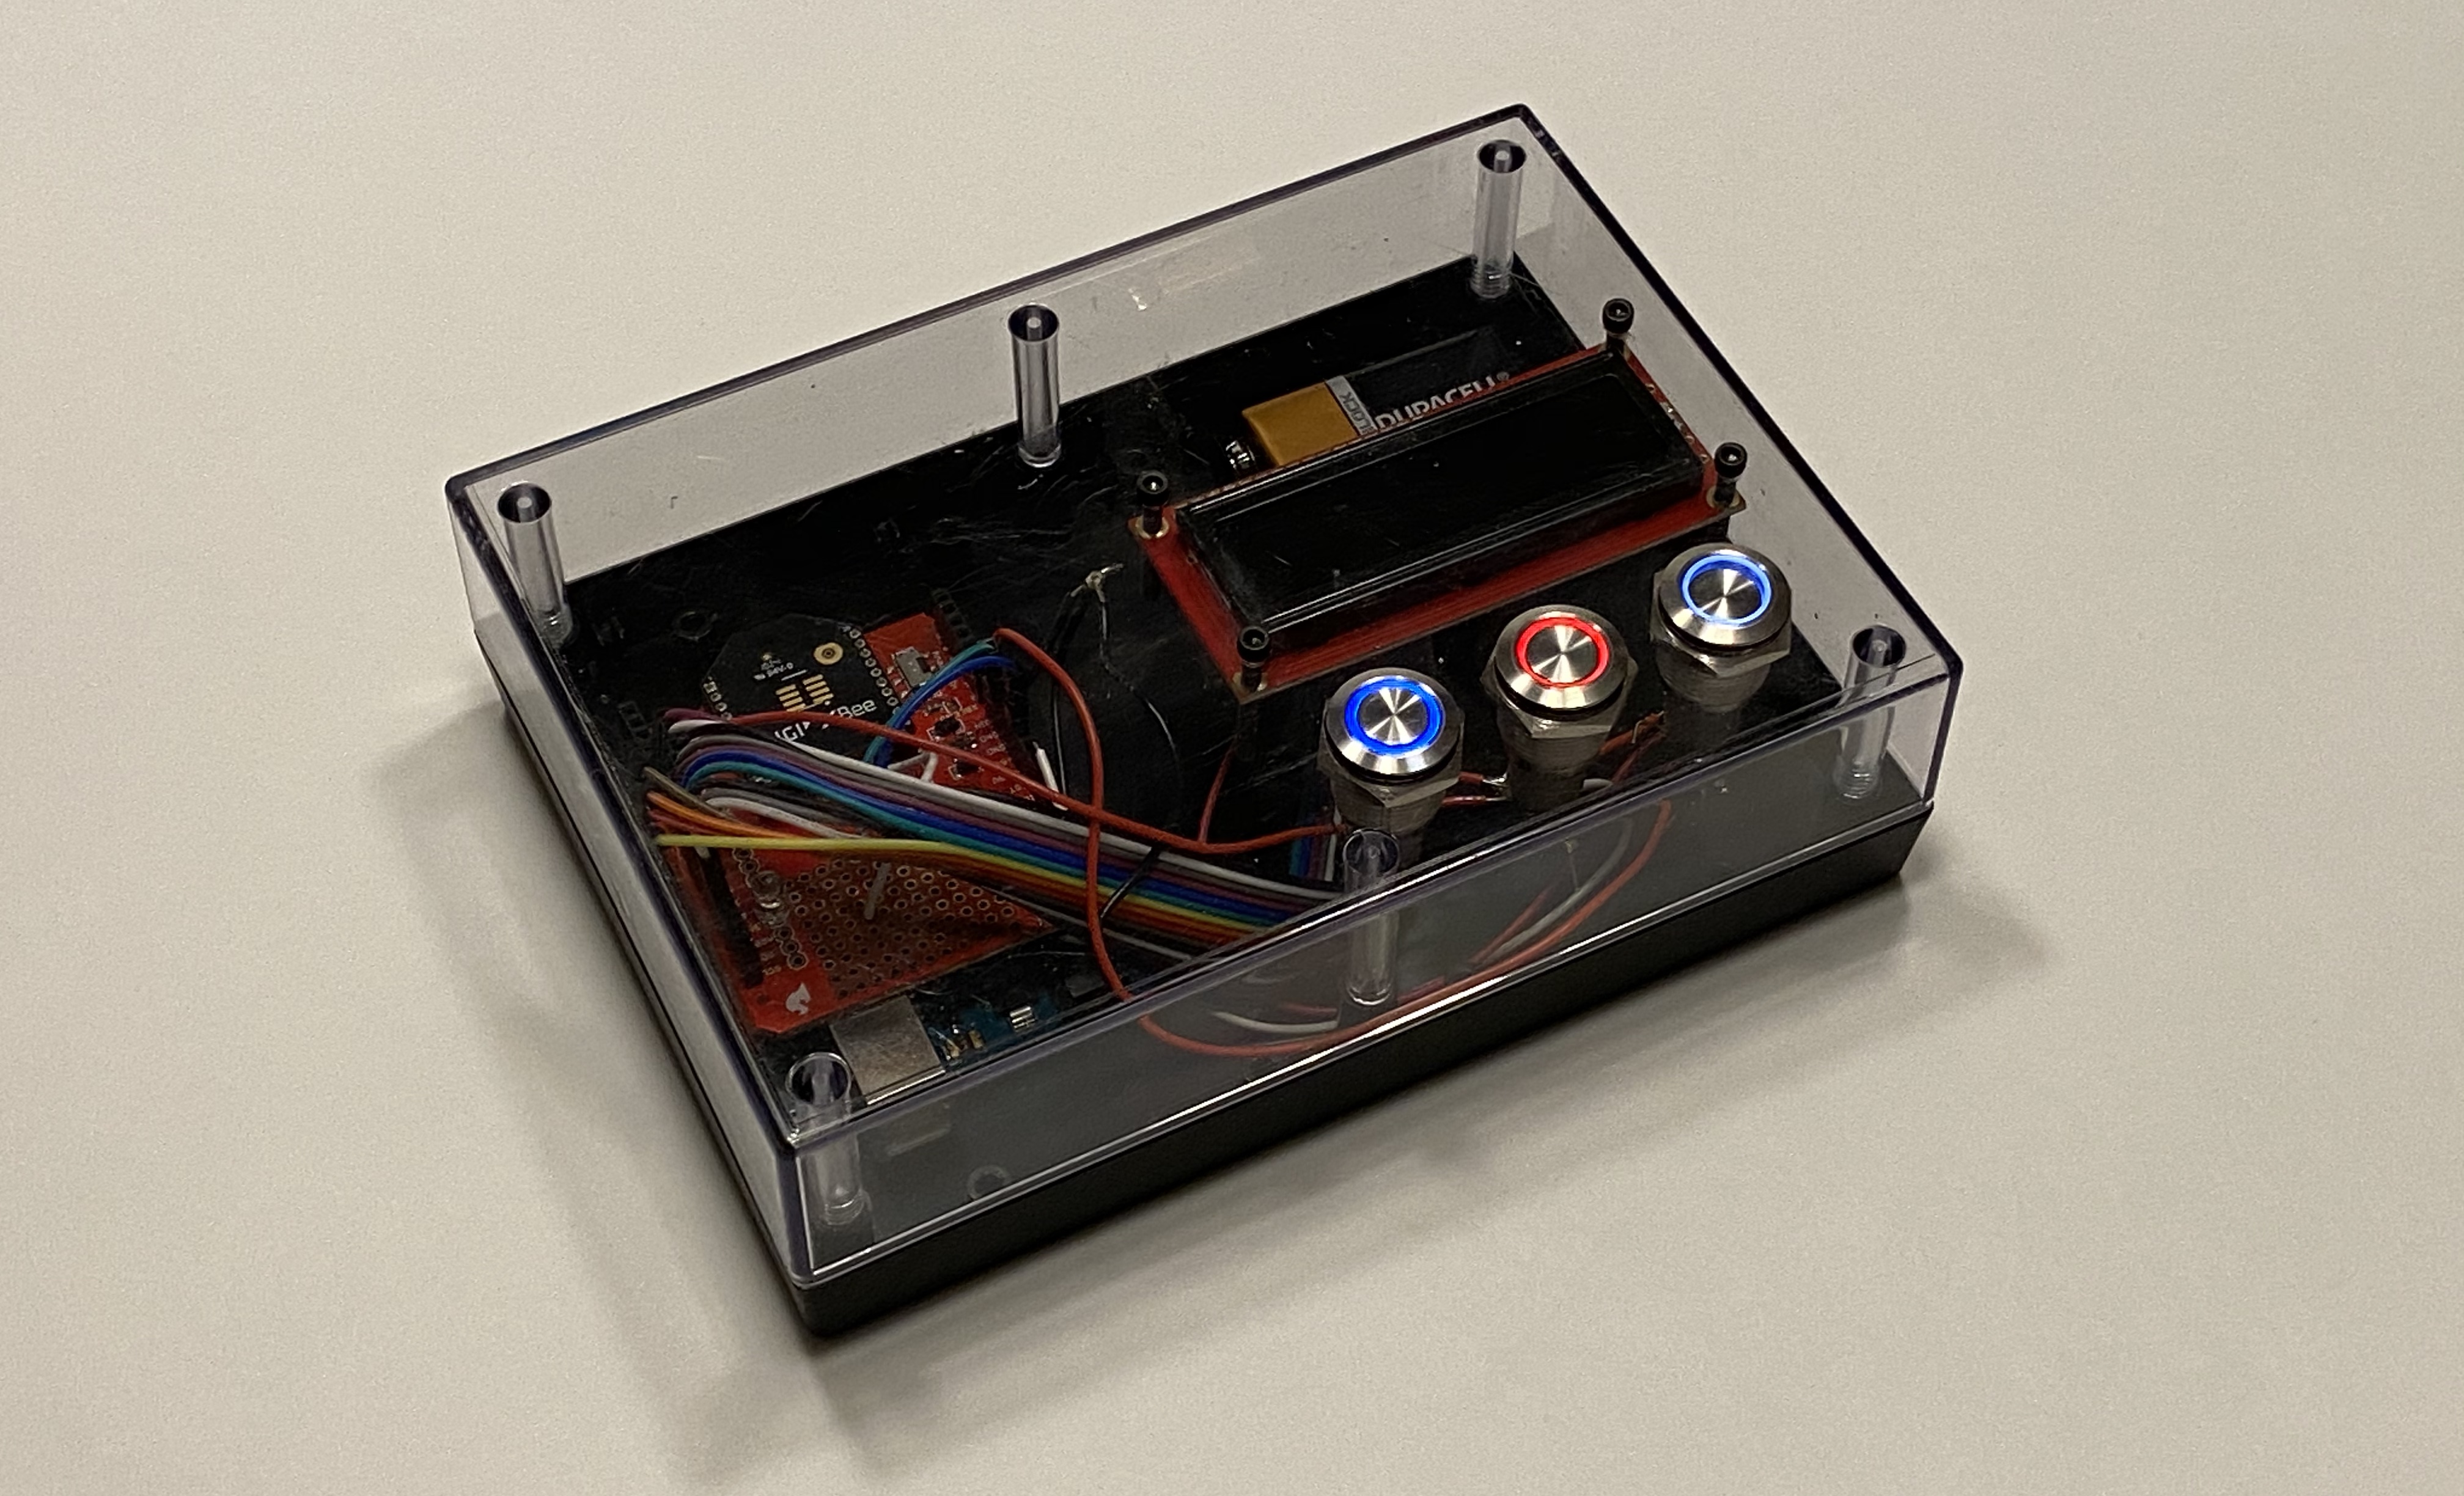
The final version of the receiver module
Overview
I built an indoor positioning system (IPS) as a capstone project at my high school. It acts as an indoor replacement for GPS, which does not work well when obstructed by walls and ceilings. The system uses the Zigbee protocol to send signals between the main receiver module and transmitters placed throughout the area. The system then takes the received signal strength indicators (RSSIs) and uses them to triangulate its location. I also used this project in my IPS research project.
EAGLE Electrical CAD
I was able to apply my EAGLE skills in all stages of this project. I used EAGLE to design my original schematics for the modules. Later in the process, I used EAGLE to design circuit boards that I could then produce to use in the IPS. A schematic I produced in the program is shown below.
PCB Design/Manufacture
Later into the prototyping process, I designed PCBs in EAGLE and then produced them in-house. I used heat-transfer paper to to transfer a negative image on copper-clad boards. I then used ferric chloride to etch the exposed copper. After this, I ran drilling operations on a 3-axis mill using micro drill bits to clear component through holes.
Wireless Communication Electronics
Since the system was premised upon the use of wireless signals, I utilized quite a few wireless technologies in my testing phase. I ultimately landed on ZigBee, but I also tested out Wi-Fi, Bluetooth, and 915MHz ISM transceivers. I was able to become familiar with the features, strengths, and weaknesses of these various technologies.
Arduino
I used Arduino as my main microprocessor and programming software. I used the Arduinos to parse data from the transceivers and then process it. The Arduino on the main receiver also drove the LCD display that output the calculated position to the user.
CNC Machining
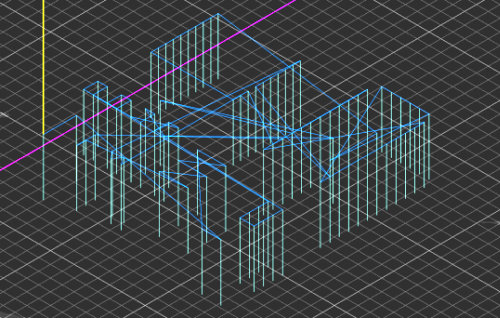
Simulation of the drilling operation I used on my PCBs
I used a 3-axis mill for two main parts of this project. Primarily, I used it for drilling operations on the circuit boards I manufactured. However, I also used it on the box holding the main receiver. I ran machining operations to create holes for the buttons in the acrylic top of the case.
Supporting Content
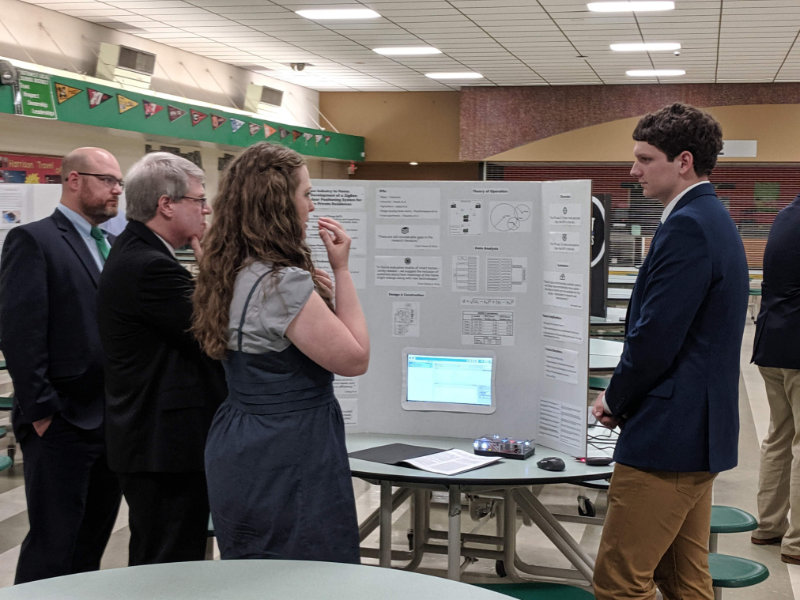
Me presenting my work to the school board
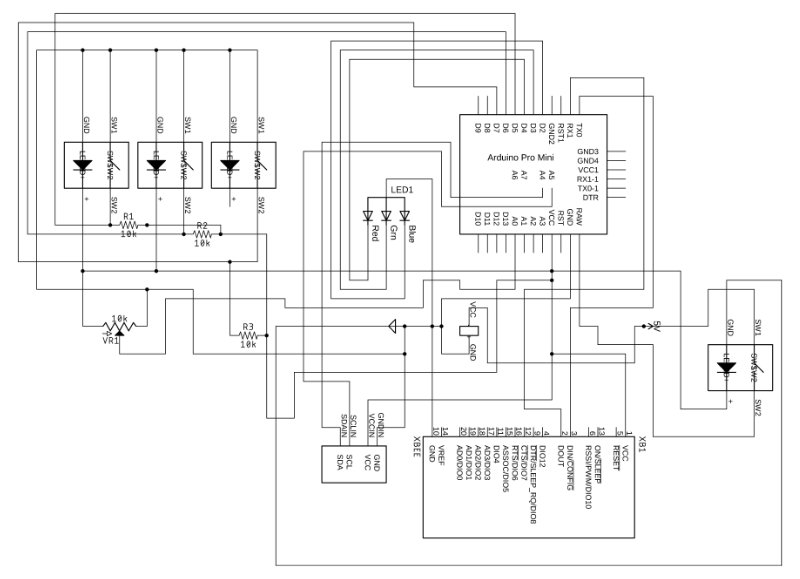
A schematic of one of my early prototypes
IPS Research Paper
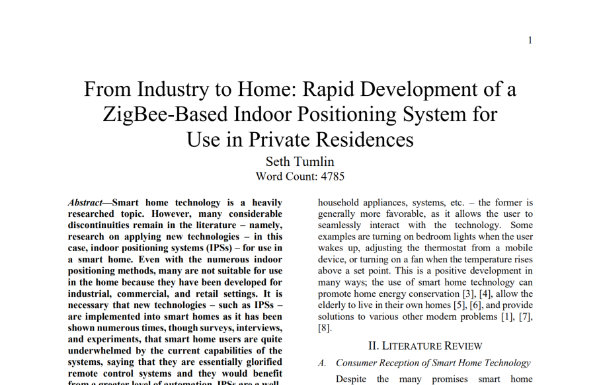
The paper that I wrote based on research on my IPS
Overview
Based on my Indoor Positioning System (IPS) project, I performed research on its accuracy and precision vs. traditional GPS indoors for my AP Research class. I designed testing procedures, implemented them, collected the data, analyzed it, and aggregated it all in an IEEE academic style paper.
Technical Writing
This skill was the basis of this project. I used this project to learn the basics of technical writing; from word choice to formatting. I was able to have the paper reviewed by industry professionals that write technically on a daily basis.
Microsoft Office
Not only was I able to use Word and PowerPoint for the paper and presentation components of this project, I also utilized Excel to store and analyze data I collected from my trials. Excel served as my main modeling tool for this project.
LaTeX
I am currently learning more about the formatting methods of LaTeX by recasting this paper in the language.
Supporting Content
The research paper
The presentation
Personal Website
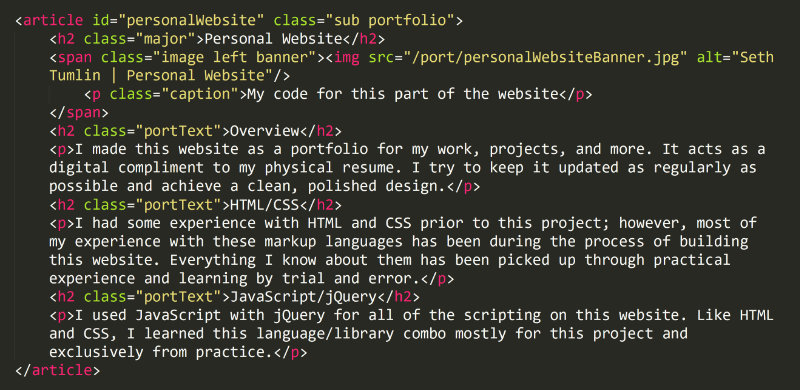
My code for this part of the website
Overview
I made this website as a portfolio for my work, projects, and more. It acts as a digital compliment to my physical resume. I keep it updated as regularly as possible and try to achieve a clean, polished design.
HTML/CSS
I had some experience with HTML and CSS prior to this project; however, most of my experience with these markup languages has been during the process of building this website. Everything I know about them has been picked up through practical experience and learning by trial and error.
JavaScript/jQuery
I used JavaScript with jQuery for all of the scripting on this website. Like HTML and CSS, I learned this language/library combo mostly for this project and exclusively from practice.
2019 FRC Robot
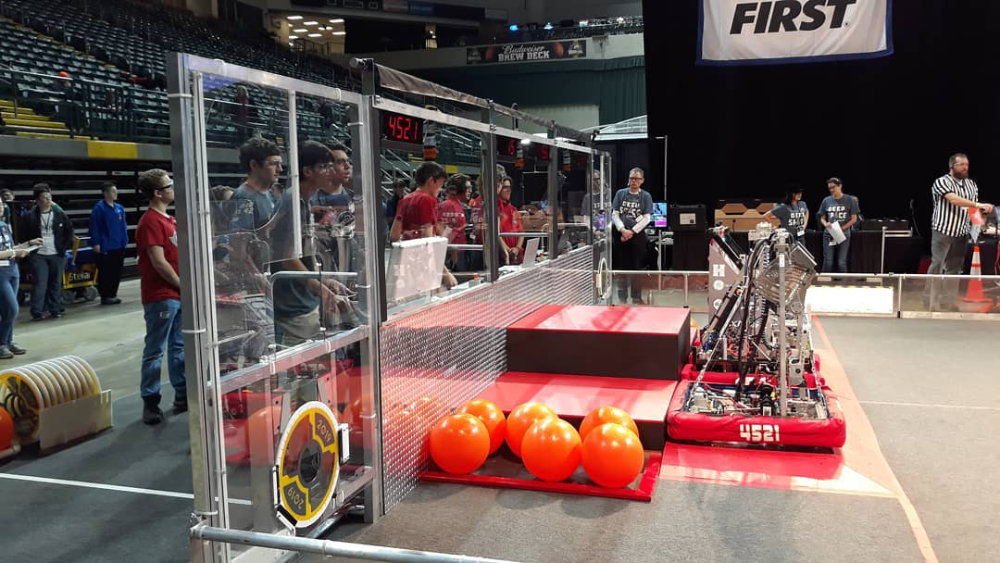
The robot waiting to start a match
Overview
My high school's FRC robotics team, team 4521, is part of the national FRC competition, which includes thousands of teams that are given 6 weeks to build a robot that competes in a sport-like game against the other robots. In 2019, I was the CEO of the team, Head of Programming & Electrical Division, and the Drive Coach. As CEO, I had to be extremely involved in the technical and managerial aspects of the robot/team. This was especially difficult since our only technical mentor had just left. I worked with parent volunteers and new mentors to make sure that we had a successful season despite this.
Team/Project Management
As mentioned earlier, our 2019 season was unlike any previous season. As CEO I was responsible for informing the new mentors on season timelines, fees, fundraising, and more. Most of the students were new to the team as well, because many of our members had graduated the previous year. Before the season, I worked to ensure we had the proper students in the proper leadership roles on the the team. During the season, I was responsible for coordinating work sessions, assigning duties, and working on robot design/fabrication directly.
Fusion 360 CAD/CAM
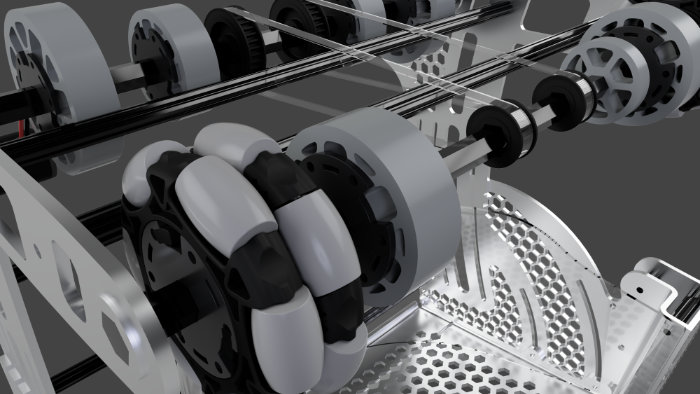
Closeup rendering of the grabber I designed
With the CEO being the de-facto head of design, I spent much of the early season in Fusion 360. I used it to review, markup, and integrate member's designs, as well as perform quite a bit of design work myself.
Additionally, I used the Fusion CAM engine to create machining programs for various parts.
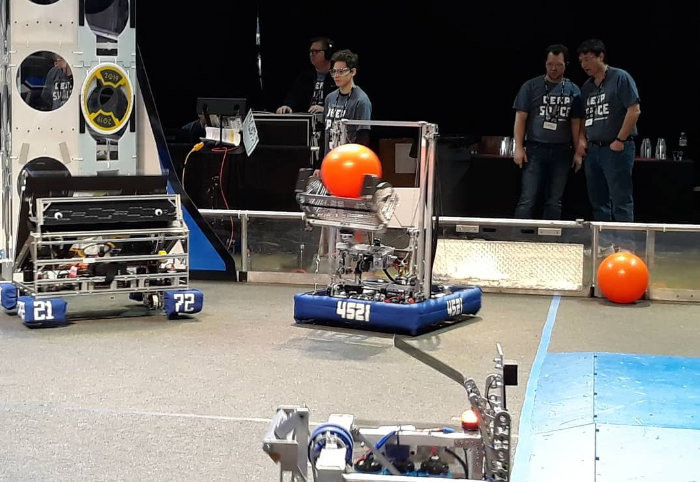
The robot carrying a game piece as judges watch
LabVIEW
As I still held my role as Head of Electrical & Programming Division, I was responsible for developing much of the program for the robot in LabVIEW. This season, I also had the responsibility of training students to take over the role the next year since I would be graduating.
CNC Machining
I spent a considerable amount of my time this season machining robot parts on our teams mill and lathe. I mostly worked on aluminum, but also machined a few parts from nylon, such as the elevator pulleys.
Aluminum Metalwork
The previous year, we had used T-slotted framing for most of our robot; however, this year, we wanted to cut down on weight by using raw aluminum extrusions. This meant I spent a lot of time cutting, grinding, and bolting aluminum for the robot. We also used sheet aluminum which we manufactured with laser cutters, press brakes, and water jet cutters at local shops.
Soldering
We had decided to build a robot with a very tall lift mechanism (about 8 feet when fully extended) early in our design process. One of the biggest issues with this is the difficulty of routing sensor lines to the chassis where the microcontroller is. To deal with this, I created a custom wire harness that coiled/uncoiled and slid along the lift tension cables. This harness carried various PWM lines for position and limit sensors, as well as a line for the camera, which was mounted on the innermost stage of the lift.
Technical Writing & Microsoft Office
I prepared a technical manual to show judges at the competition. It documented the mechanical aspects of the robot and I created it in Microsoft Word.
Supporting Content
The Technical Guide I prepared for the mechanical components of the robot
A video of one of our matches at the Cleveland regional competition (our robot is 4521)
Spring 2020 ENED

Robot for the main project
Overview
This class is the second in the two-course first-year engineering series at UC. This course, like the first course, relies heavily upon individual and team projects. I served as the project manager for my team as we navigated three projects and, near the end, adapted to the remote format. The course introduced the basics of Chemical, Mechanical, and Electrical Engineering (material/energy accounting, stress analysis, circuit analysis, and more) as well as general tools such as Python, MATLAB, VBA, and statistical methods. Because of the remote transition, the course also included CAD in lieu of physically building robots.
MATLAB
This was my first exposure to MATLAB. In the class, we used the language for many projects in the areas of image processing, statistical analysis, spatial simulation, and others.
The first project that we used MATLAB for was the Academic Poster Presentation. In this project, my team had to choose a topic from the Engineering Grand challenges and use computational statistics to create a model demonstrating why the problem is important. My team chose "provide energy from fusion." We used MATLAB to create models which I organized into various formats (which can be found below). I created the "Current State of Generation Technology" and "Research in Areas Vital to the Development of Nuclear Fusion" models, and assisted my teammates in creating the other models.
The second project that involved MATLAB was the robot project. Once the project was made "virtual," part of it was to create a simulation of the robot's function—I did this using MATLAB. The project required that the robot moved around a warehouse, scanned box "barcodes" (which were represented in a MATLAB array), picked up the proper boxes, and returned them to a specified location (while avoiding obstacles). A video demonstrating the program is available below.
Technical Writing

3D printed white legs and red facade are visible here
Being the Project Manager for my team, I was responsible for many of the documents demonstrating the team's work. Many of these were management reports, but I also wrote instruction manuals and research papers, all of which can be found below.
VBA/Microsoft Office
Visual Basic for Applications (VBA) was one of the main components of the course curriculum. We learned the basics of the language as well as how to apply it to Office macros and Excel functions. I was able to use the language to simplify the statistical analysis of large data sets.
Python
In the class, we learned Python through various miniature projects. Later in the semester, I used Python to program my team's robot. This continued until the closure of campus meant that the physical robot project was no longer possible.
Fusion 360
Fusion 360—or any CAD program, for that matter—was not a part of the course's curriculum. However, after the physical robot project was canceled due to the closure of campus, we were tasked with creating a "virtual robot." This included two parts, one of which was to create a robot design via drawing, CAD, etc. I created a robot model using Fusion 360. The renderings of the models can be seen below.
Before the project became virtual, I designed a few parts using Fusion 360 to be laser-cut/3D printed for the robot we were building.
Team/Project Management
Serving as Project Manager for my team, we completed three projects; a simple timer using engineering principles, a statistical modeling and research project that culminated in an academic poster presentation, and a robot project (which later became virtual). During these projects, my responsibilities included organizing meetings, documentation, and more. Serving in this role was especially difficult during the remote portion of the semester.
Affinity Designer
Presentation and quality were always part of the class's grading system. Because of this, I used Designer to create good-looking papers/posters. The two main examples of this were the timer instruction manual and the academic poster (both of which can be found below).
Laser Cutting

3D printed white legs and red facade are visible here
Before the robot project became virtual, the team was having trouble building arms for the robot with only LEGO pieces. The project allowed us to use any pieces that we 3D printed or laser-cut in addition to the LEGOs. I designed arm pieces in Fusion 360 and laser-cut them out of 5/8" cast acrylic sheets. They worked excellently for the purpose and looked great too.
Supporting Content
A video of the robot walking
Repository of LabVIEW, Python, & Excel I produced during the course
The design presentation I prepared
The management report I prepared
The notebook that we worked on throughout the project
Contact
Feel free to email me at seth@sethtumlin.com
Or connect with me on one of the following:
Elements
Text
This is bold and this is strong. This is italic and this is emphasized.
This is superscript text and this is subscript text.
This is underlined and this is code: for (;;) { ... }. Finally, this is a link.
Heading Level 2
Heading Level 3
Heading Level 4
Heading Level 5
Heading Level 6
Blockquote
Fringilla nisl. Donec accumsan interdum nisi, quis tincidunt felis sagittis eget tempus euismod. Vestibulum ante ipsum primis in faucibus vestibulum. Blandit adipiscing eu felis iaculis volutpat ac adipiscing accumsan faucibus. Vestibulum ante ipsum primis in faucibus lorem ipsum dolor sit amet nullam adipiscing eu felis.
Preformatted
i = 0;

while (!deck.isInOrder()) {
    print 'Iteration ' + i;
    deck.shuffle();
    i++;
}

print 'It took ' + i + ' iterations to sort the deck.';
Lists
Unordered
- Dolor pulvinar etiam.
- Sagittis adipiscing.
- Felis enim feugiat.
Alternate
- Dolor pulvinar etiam.
- Sagittis adipiscing.
- Felis enim feugiat.
Ordered
- Dolor pulvinar etiam.
- Etiam vel felis viverra.
- Felis enim feugiat.
- Dolor pulvinar etiam.
- Etiam vel felis lorem.
- Felis enim et feugiat.
Icons
Actions
Table
Default
| Name |
Description |
Price |
| Item One |
Ante turpis integer aliquet porttitor. |
29.99 |
| Item Two |
Vis ac commodo adipiscing arcu aliquet. |
19.99 |
| Item Three |
Morbi faucibus arcu accumsan lorem. |
29.99 |
| Item Four |
Vitae integer tempus condimentum. |
19.99 |
| Item Five |
Ante turpis integer aliquet porttitor. |
29.99 |
|
100.00 |
Alternate
| Name |
Description |
Price |
| Item One |
Ante turpis integer aliquet porttitor. |
29.99 |
| Item Two |
Vis ac commodo adipiscing arcu aliquet. |
19.99 |
| Item Three |
Morbi faucibus arcu accumsan lorem. |
29.99 |
| Item Four |
Vitae integer tempus condimentum. |
19.99 |
| Item Five |
Ante turpis integer aliquet porttitor. |
29.99 |
|
100.00 |
